How Do I SSH Into Pi Over The Internet Using A Secure And Reliable Method
Are you looking for a way to access your Raspberry Pi remotely over the internet? Secure Shell (SSH) is one of the most reliable methods to achieve this. By enabling SSH on your Raspberry Pi, you can remotely control and manage your device from anywhere in the world. This article will guide you step-by-step on how to SSH into your Raspberry Pi over the internet, ensuring both security and ease of use. Whether you're a beginner or an experienced user, this guide will help you navigate the process seamlessly.
SSH, or Secure Shell, is a cryptographic network protocol that allows secure communication between two devices. It is widely used by developers, system administrators, and hobbyists to manage servers and devices remotely. Raspberry Pi, a versatile single-board computer, is often used in projects requiring remote access. However, accessing your Pi over the internet requires careful setup to avoid security risks. This guide will walk you through everything you need to know about setting up SSH for your Raspberry Pi, including prerequisites, configuration steps, and best practices.
In today's interconnected world, remote access to devices like the Raspberry Pi has become essential. Whether you're managing a home automation system, hosting a web server, or running IoT projects, SSH provides a secure way to interact with your Pi. In this article, we will cover everything from enabling SSH on your Pi to configuring your router and securing your connection. By the end of this guide, you will have a fully functional SSH setup that allows you to access your Pi from anywhere in the world.
Read also:Keyla Monterroso Mejia Ethnicity A Deep Dive Into Her Roots And Cultural Identity
Table of Contents
- Introduction to SSH and Its Importance
- Prerequisites for SSH Access
- How to Enable SSH on Raspberry Pi
- Configuring Your Router for Remote Access
- Setting Up Dynamic DNS for Your Pi
- Adjusting Firewall Settings for SSH
- Best Practices for Securing Your SSH Connection
- Troubleshooting Common SSH Issues
- Advanced Tips for SSH Users
- Conclusion and Next Steps
Introduction to SSH and Its Importance
SSH, or Secure Shell, is a protocol that provides a secure channel over an unsecured network. It is widely used for remote command-line login, file transfer, and other network services. When it comes to Raspberry Pi, SSH allows you to access the device's terminal remotely, enabling you to execute commands, install software, and manage files without needing physical access to the device.
One of the key advantages of SSH is its encryption. Unlike older protocols like Telnet, SSH encrypts all data transmitted between the client and the server, making it difficult for attackers to intercept sensitive information. This is particularly important when accessing your Raspberry Pi over the internet, where the risk of unauthorized access is higher.
Why Use SSH for Raspberry Pi?
- Remote access to your Pi from anywhere in the world.
- Secure communication through encryption.
- Ability to manage files, install software, and run commands without physical access.
- Supports automation and scripting for advanced users.
Prerequisites for SSH Access
Before you can SSH into your Raspberry Pi over the internet, there are a few prerequisites you need to fulfill. These include having a Raspberry Pi with an operating system installed, an internet connection, and some basic knowledge of networking. Let's break down the requirements:
1. Raspberry Pi Setup
- Ensure your Raspberry Pi is running a compatible operating system like Raspberry Pi OS.
- Make sure your Pi is connected to the internet via Wi-Fi or Ethernet.
- Update your system using the command
sudo apt update && sudo apt upgrade.
2. Static IP Address
To avoid issues with changing IP addresses, it is recommended to assign a static IP address to your Raspberry Pi. You can configure this in your router settings or directly on the Pi using the dhcpcd.conf file.
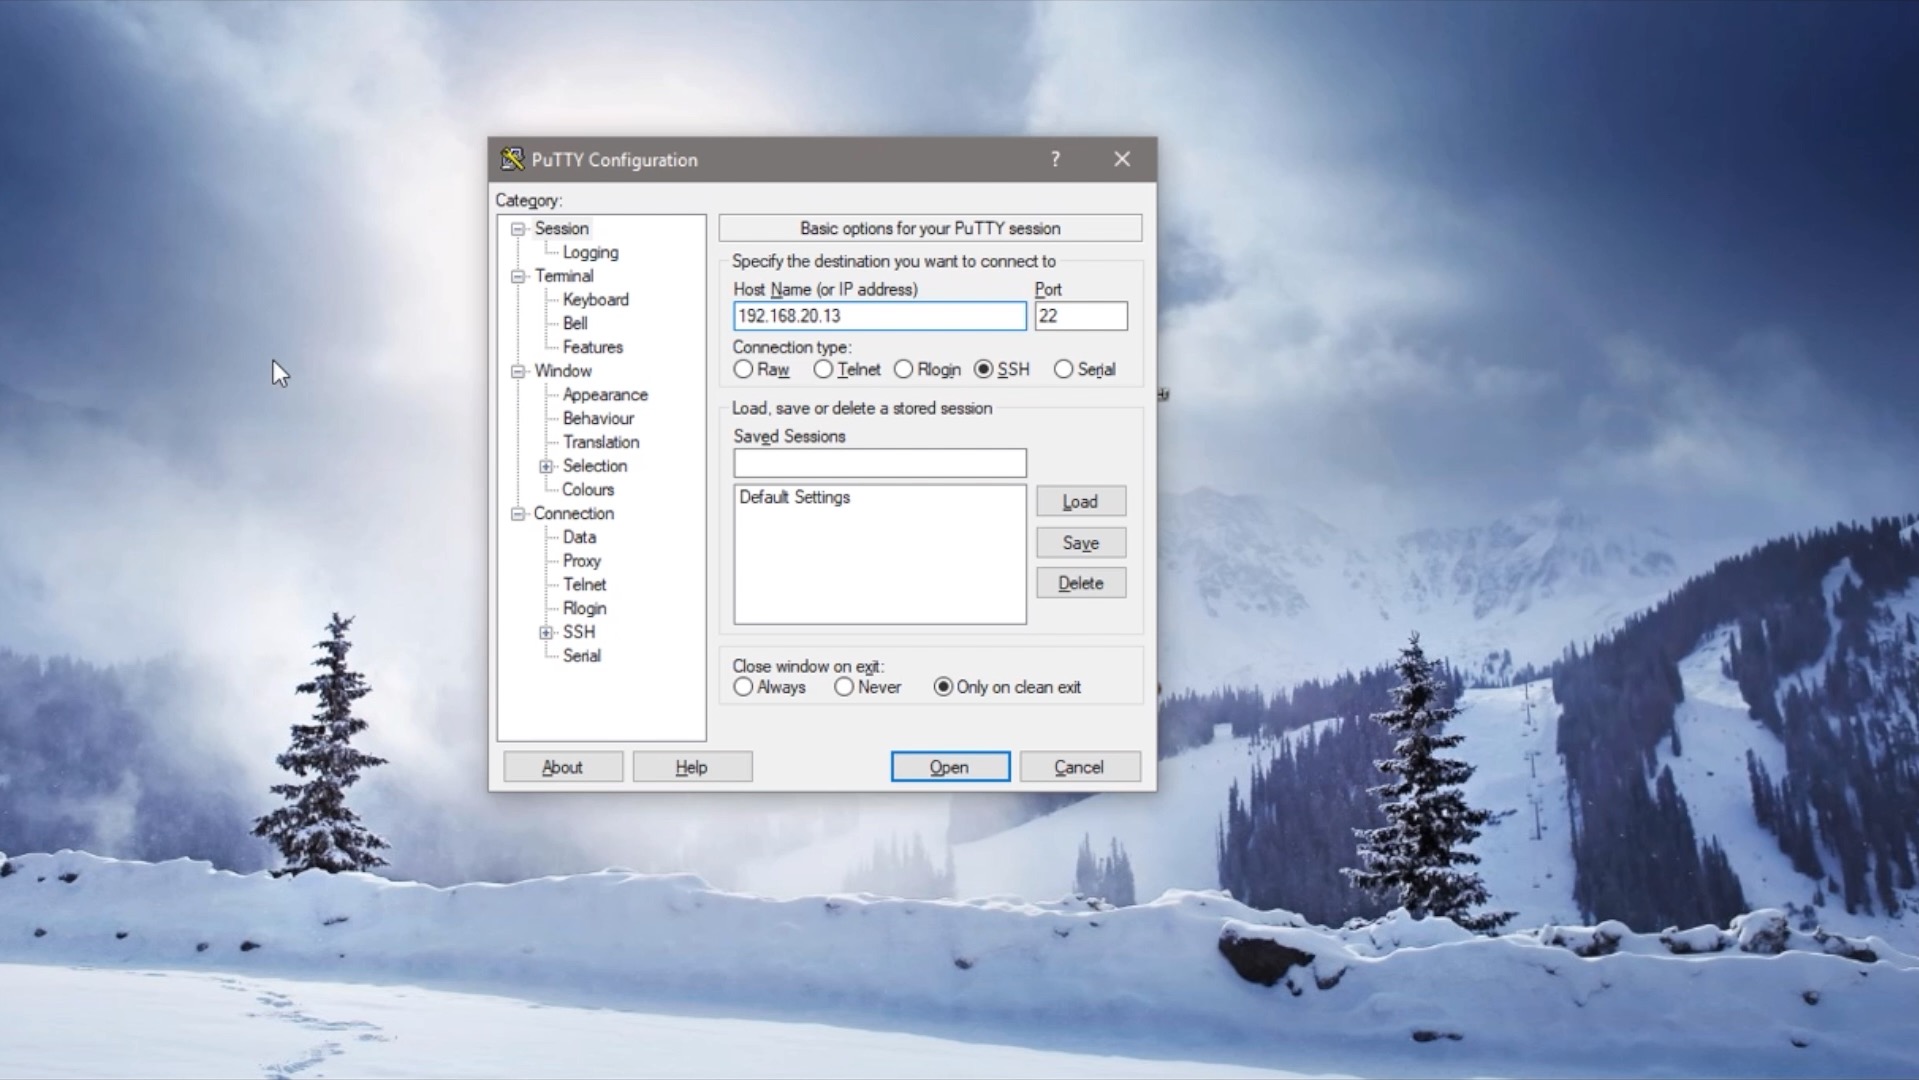
3. SSH Client
You will need an SSH client on your computer to connect to the Pi. Popular options include PuTTY for Windows and the built-in Terminal for macOS and Linux users.
How to Enable SSH on Raspberry Pi
Enabling SSH on your Raspberry Pi is a straightforward process. Follow these steps to activate SSH:
Read also:Vijay Varma The Actors Journey
Step 1: Enable SSH via Raspberry Pi Configuration
- Open the Raspberry Pi Configuration tool by navigating to
Menu > Preferences > Raspberry Pi Configuration. - Go to the "Interfaces" tab and enable SSH.
- Click "OK" to save the changes.
Step 2: Create an Empty SSH File
If you are using a headless setup (no monitor or keyboard), you can enable SSH by creating an empty file named ssh in the boot partition of your SD card. This will automatically enable SSH on the next boot.
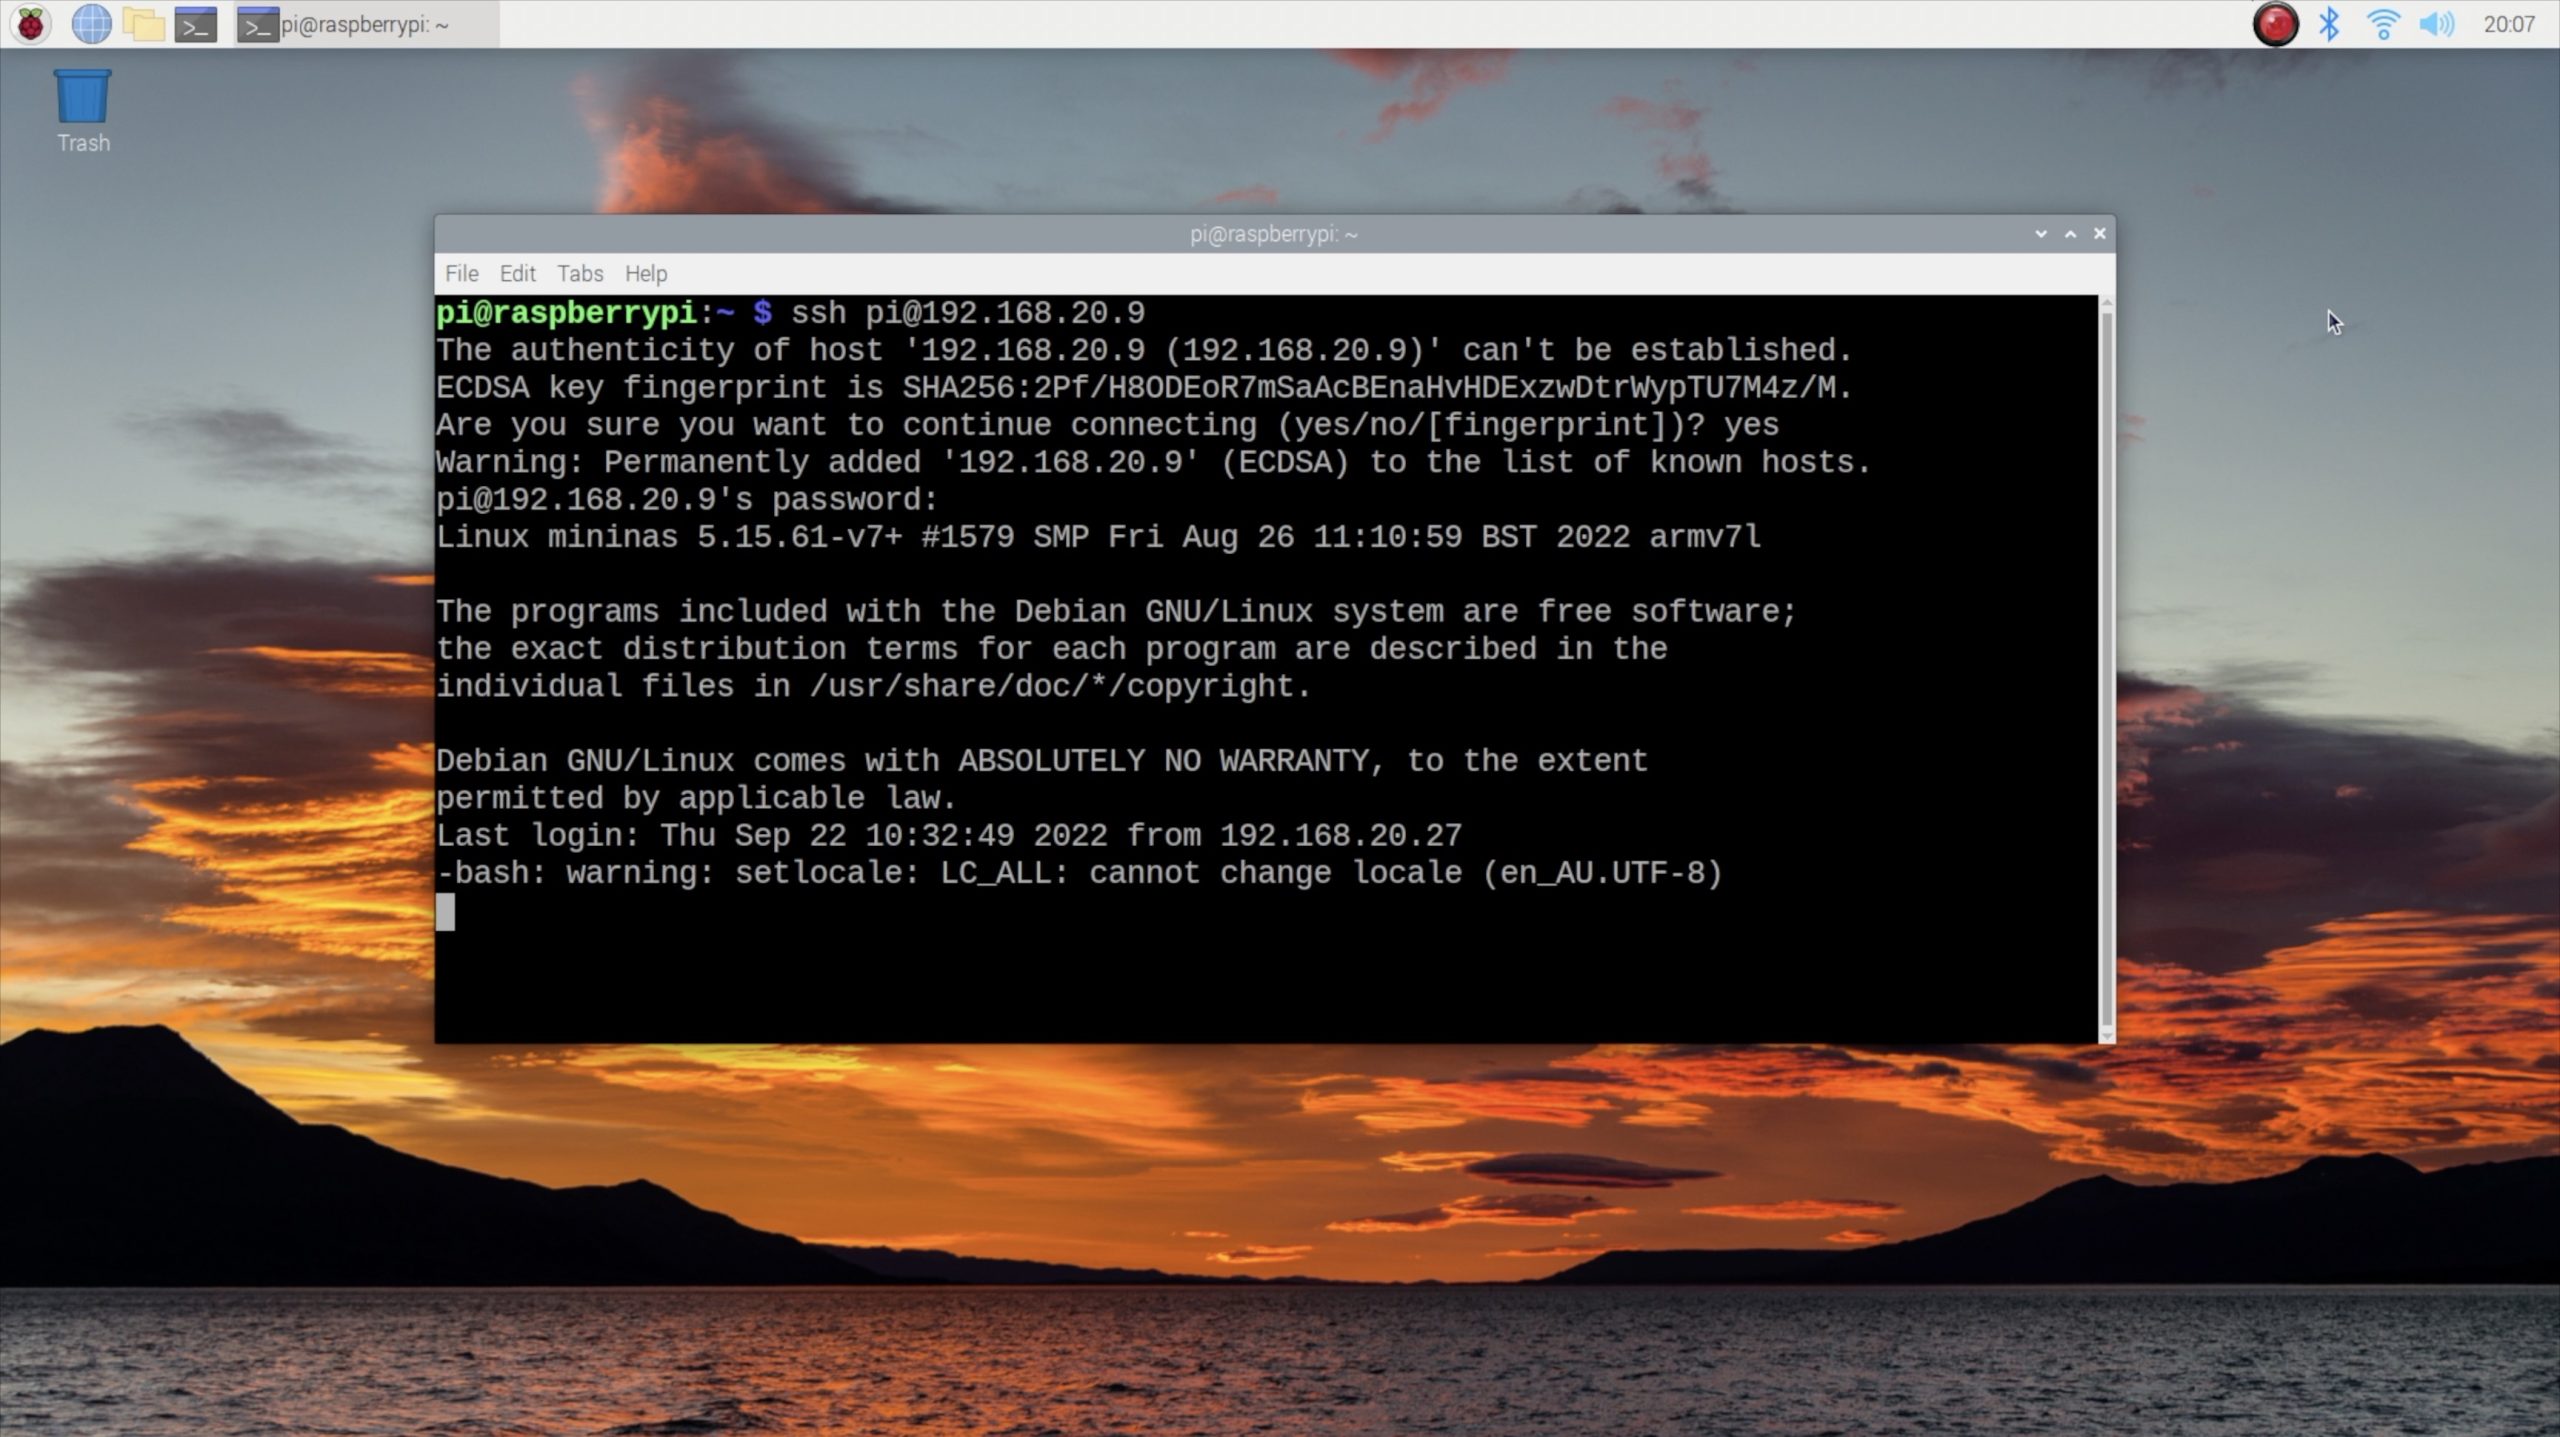
Step 3: Test SSH Locally
Before attempting to connect over the internet, test SSH locally by using the command ssh pi@ from another device on the same network.
Configuring Your Router for Remote Access
To SSH into your Raspberry Pi over the internet, you need to configure your router to forward traffic to your Pi. This process is known as port forwarding.
Step 1: Find Your Pi's Local IP Address
You can find your Pi's local IP address by running the command hostname -I in the terminal.
Step 2: Access Your Router's Admin Panel
Log in to your router's admin panel using its IP address (commonly 192.168.1.1) and your admin credentials.
Step 3: Set Up Port Forwarding
- Navigate to the "Port Forwarding" section.
- Create a new rule to forward port 22 (default SSH port) to your Pi's local IP address.
- Save the changes and restart your router if necessary.
Setting Up Dynamic DNS for Your Pi
Most home internet connections use dynamic IP addresses, which can change periodically. To avoid the hassle of updating your Pi's IP address manually, you can use a Dynamic DNS (DDNS) service.
Popular DDNS Providers
- No-IP
- DuckDNS
- Cloudflare
Steps to Set Up DDNS
- Create an account with a DDNS provider.
- Choose a hostname and link it to your public IP address.
- Install the DDNS client on your Pi or configure it on your router.
Adjusting Firewall Settings for SSH
Firewalls can block incoming SSH connections, so it's important to configure them properly.
Step 1: Check Firewall Status
Run the command sudo ufw status to check if the firewall is active.
Step 2: Allow SSH Traffic
If the firewall is active, allow SSH traffic by running sudo ufw allow ssh.
Step 3: Restart the Firewall
Apply the changes by restarting the firewall with sudo ufw reload.
Best Practices for Securing Your SSH Connection
Security is paramount when accessing your Pi over the internet. Here are some best practices to follow:
1. Change the Default Password
The default password for the Pi user is "raspberry." Change it immediately using the passwd command.
2. Use Key-Based Authentication
Instead of relying on passwords, use SSH keys for authentication. This is more secure and convenient.
3. Disable Root Login
Edit the SSH configuration file (/etc/ssh/sshd_config) and set PermitRootLogin no to disable root login.
4. Change the Default SSH Port
Change the default SSH port (22) to a non-standard port to reduce the risk of automated attacks.
Troubleshooting Common SSH Issues
If you encounter issues while setting up SSH, here are some common troubleshooting steps:
1. Connection Refused
This usually happens if the SSH service is not running or the port is blocked. Check the SSH service status with sudo systemctl status ssh.
2. Timeout Error
A timeout error may indicate a problem with your router's port forwarding settings or your Pi's firewall configuration.
3. Authentication Failed
Ensure that you are using the correct username and password or SSH key. Double-check your credentials.
Advanced Tips for SSH Users
Once you have a basic SSH setup, you can explore advanced features to enhance your experience:
1. Use SSH Tunnels
SSH tunnels allow you to securely forward traffic between your local machine and the Pi.
2. Automate Tasks with SSH Scripts
Create scripts to automate repetitive tasks, such as backups or system updates.
3. Monitor SSH Logs
Regularly check the SSH logs (/var/log/auth.log) for suspicious activity.
Conclusion and Next Steps
Accessing your Raspberry Pi over the internet using SSH is a powerful way to manage your projects remotely. By following the steps outlined in this guide, you can set up a secure and reliable SSH connection. Remember to prioritize security by changing default credentials, using key-based authentication, and configuring firewalls properly.
Now that you have successfully set up SSH on your Raspberry Pi, why not explore other ways to enhance your remote access experience? You can experiment with advanced SSH features or integrate your Pi into larger IoT projects. Share your thoughts in the comments below, or check out our other articles for more tips and tutorials.
How To Place A Tampon: A Comprehensive Guide For Comfort And Confidence
Elon Kids: Exploring The Lives And Potential Of Elon Musk's Children
Noughty America: Exploring The Rise Of Adult Entertainment In The Digital Age
SSH Into Pi Zero The DIY Life
Putty to SSH Into Pi The DIY Life
